Join Mike & I as we Attempt to Winter Camp in a Snow Trench at -15° F, Deep in the Woods of the White Mountains.
For this winter backpacking & Snow Camping adventure, we’ll be heading into the austere terrain of the Dry River Wilderness in New Hampshire’s White Mountains. Our main challenge for this adventure will be to sleep without the comforts of a tent of hammock. Our goal is to use bivvy sacks to protect our sleeping bags from the elements as well as extend the range of our sleeping bags. The latter of which is of particular importance because we’ll be packing in sleeping bags rated for around 15° to 20° F, in temperatures of around -15° F. Our secondary objective will be to hit the summit of Mt Crawford, replete with stunning, 360° views of the White Mountains. Oh, and we’ve got some pretty fun backpacking food on the menu as well. We’ll be camp cooking all “real food” on this trip, thanks to the sub-zero temps, no traditional dehydrated backpacking food.
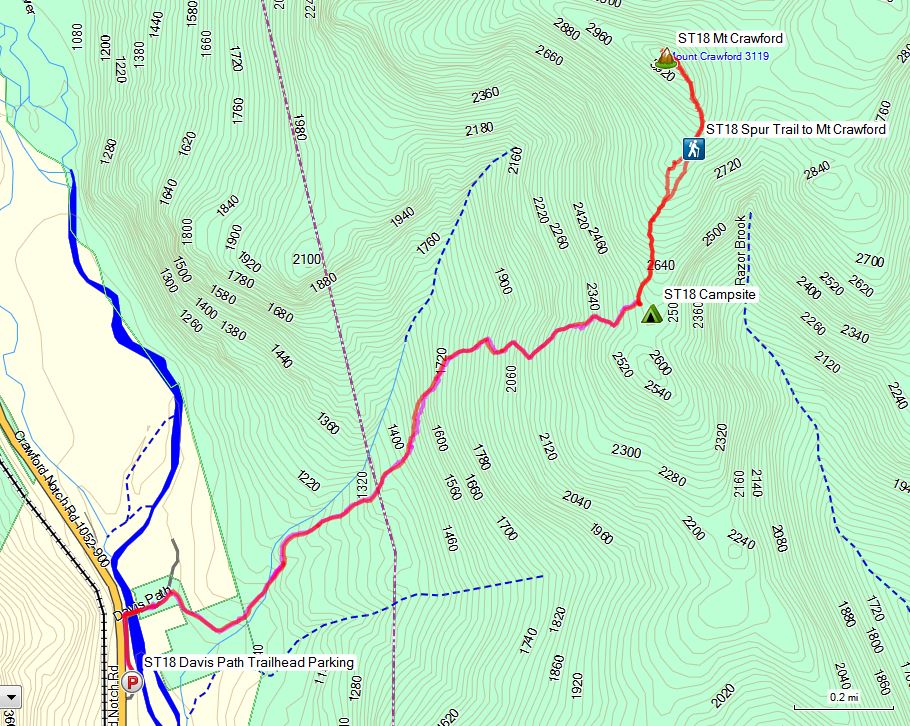
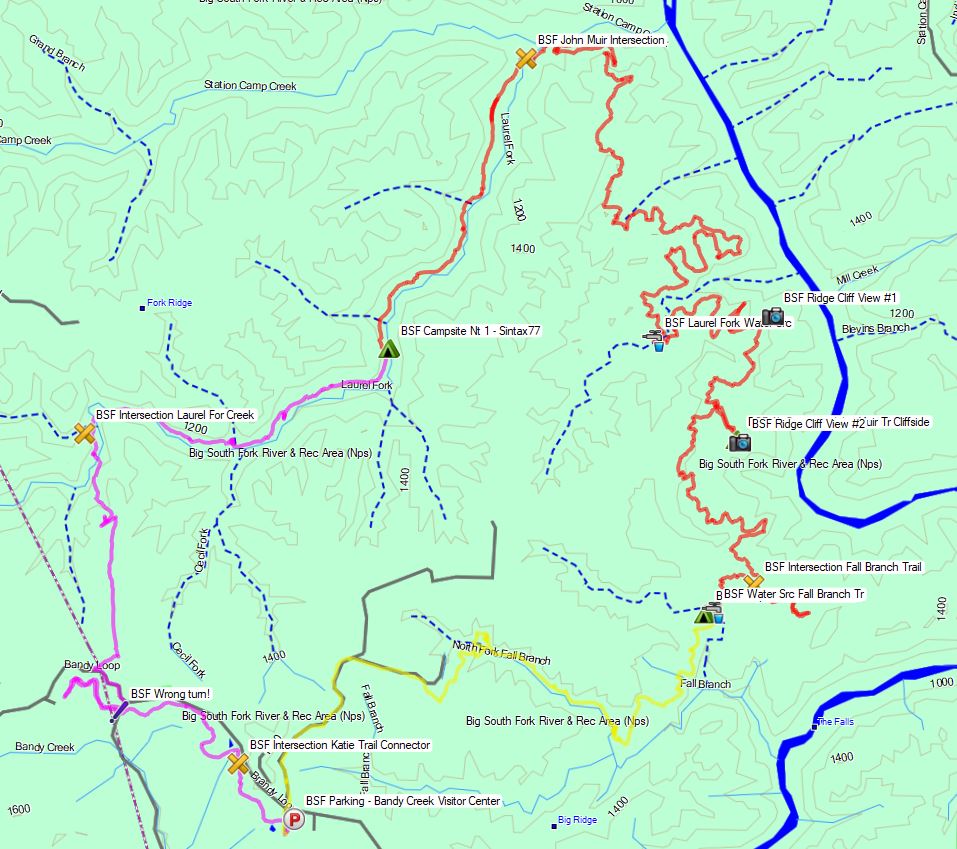
Route Overview – Snow Trench Camping – Sintax77
Topics Covered in this Episode
- Winter Campsite selection, via topographical maps, and well …pure luck.
- Winter camping snow shovels (see gear list below for further details)
- The complications of cooking backpacking food in sub-zero winter conditions.
- Digging a winter camping shelter in the snow, along with tarp setup, should you be lucky enough to have one available (we did).
- Building a fire on top of snow (not nearly as hard as you might think it is – even on the 6+ feet of snow that we had to deal with).
- Sleeping in a snow trench with a SOL Escape Bivvy sack.
- The balance of hitting a winter summit, versus well, not eating, hydrating or, you know -surviving.
Trailhead Parking
- Davis Path Trailhead, Crawford Notch Rd, Bartlett, NH 03812
- 44°07’08.1″N 71°21’15.1″W
GPS Data for this trip is available on the Trip Data Page, or by using this link for direct download: GPS Data – Snow Trench Camping Mt Crawford NH 2018 – Sintax77
Stats & Trails Used, Day One
- Park at Davis Path Trailhead.
- Head norht on the Davis Path Trail.
- Setup camp in the flat area found around 2,500′ along the Davis Path Trail.
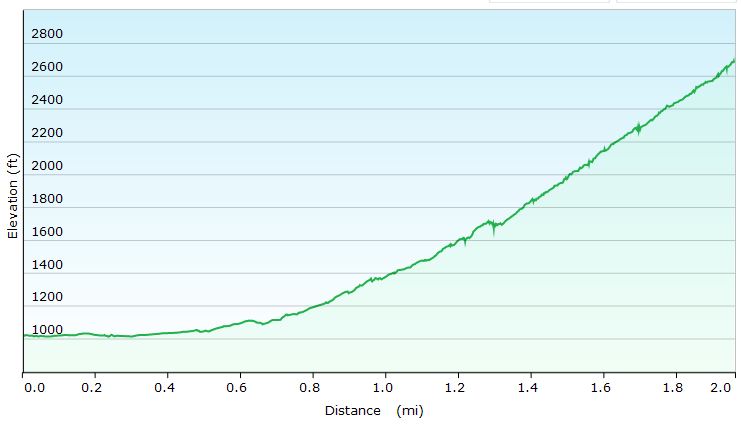
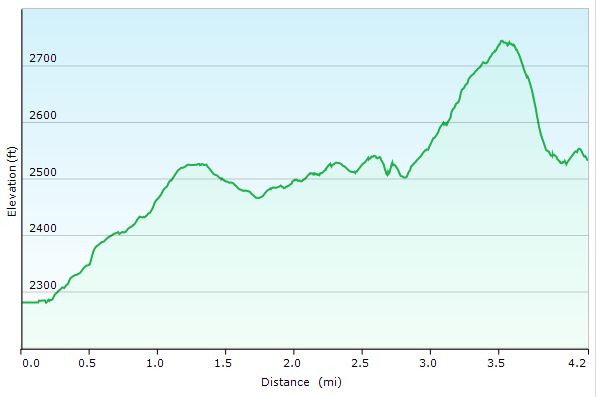
Elevation Profile Day 1 – Snow Trench Camping – Sintax77
Day 1 Mileage: 2.0 miles
Day 1 Elevation Gain: 1,725′
Stats & Trails Used, Day Two
- Wake up, get a campfire going, and cook some soup for breakfast to get fueled up.
- Grab some essential items (snacks, water, camera gear) and leave the majority of gear at camp to keep things fast and light for the upcoming high winds summit attempt.
- Rejoin Davis Path Trail and head north.
- At the junction, take the Mt Crawford Spur Trail, towards the summit of Mt Crawford.
- Head back down the same way, to return to base camp and pack up the bulk our remaining items.

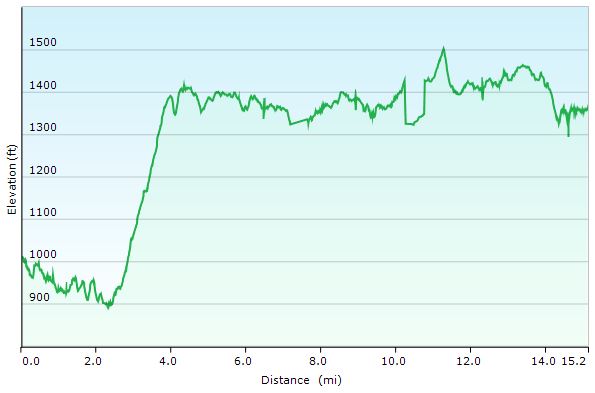
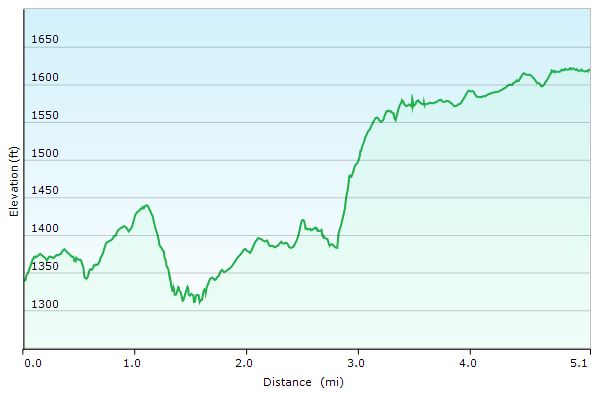
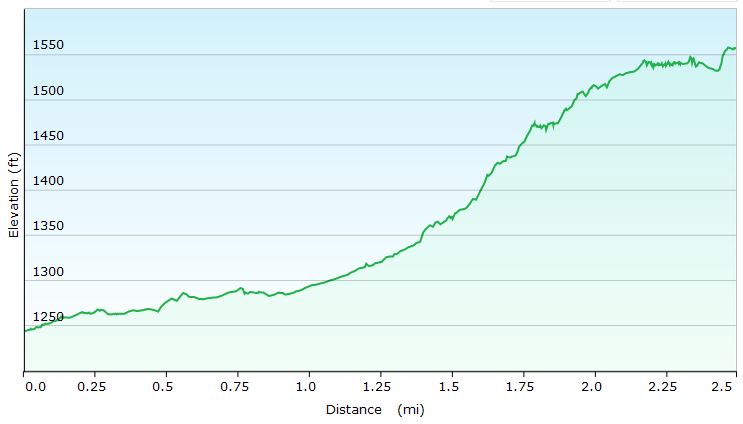
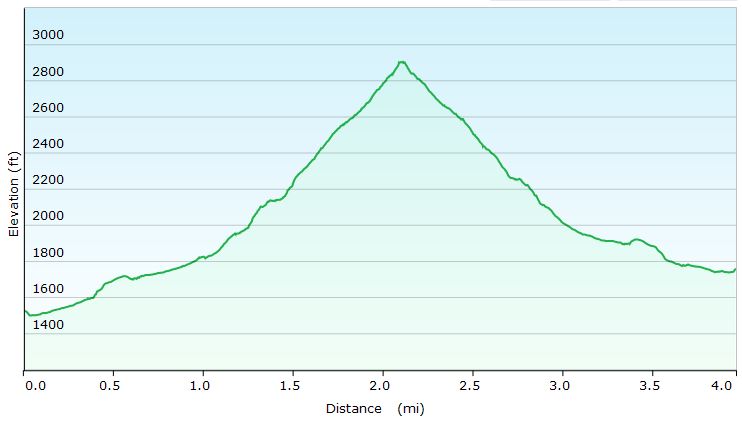
Elevation Profile Day 2 – Snow Trench Camping – Sintax77
Day 2 Mileage: 3.1 miles *0.65 miles to the summit of Mt Crawford, 2 miles from camp to the Davis Path Trailhead Parking Lot.
Day 2 Elevation Gain: 974′
Trip Totals
Total Elevation Gain: 2,699′
Total Mileage: 5.1 Miles
Notable Gear Used / Seen on this Backpacking Trip:
Pack
Backpack – EMS Longtrail 70 (2011 model)
Location
GPS Unit – Garmin Oregon 650

Cooking & Eating Utensils
Multi-fuel Camping Stove – Optimus Polaris Optifuel
Cook Pot, 1L – MallowMe
Cup – Vargo 450ml Titanium Cup
Spork, Plastic – Sea to Summit Delta Spork


Seating
Byer of Maine Tri-Lite Camp Stool
Bivvy Bag System
SOL Escape Lite Bivvy Bag
Sleep System
Sleeping Bag – Outdoor Vitals Mummy 15° Down Model
Shelter
Tarp – Hammock Gear Cuben Hex Tarp
Ground Cloth – Tyvek

Water Storage
Water Bottle – 40 Below 1 Liter Bottle w/ Bottle Boot
Light Sources
Headlamp – Olight H16 Wave LED Headlamp
12,000 lumen Mega Flashlight used to illuminate our campsite in sub-zero temps – Olight X7R Marauder


First Aid & SOS Messenger
Spot Messenger

Traction & Traversal
MSR Denali Ascent Snowshoes

Kahtoola Micro Spikes
Trekking Poles – CNOC Outdoors Carbon Fiber Vertex Trekking Poles

Snow Camping Tools
Camp Brand Snow Shovel

Clothing
Mid Layer – Surplus Military Fleece
US Army Gen III Extreme Cold Weather Trousers
Gloves – Sealskinz Water Proof Ultra Grip Gloves
EMS Over-mittens w/ US Army Wool Gloves
Boots, Winter High Top Garmont GTX
Face mask / neck gaiter by Seirus Innovation


 Alpha
Alpha

 hammock sleeping system

 (Mike’s Pack)
 USB Rechargeable Headlamp
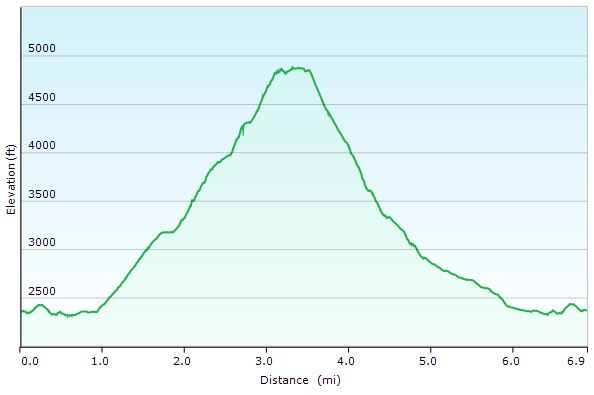
 Bear Canister
 in
in